miCasaverde
Vera Lite
SKU: MCV_VERA_L
Quickstart
This is a
C This device is a Z-Wave control center. The device is controlled via webinterface. To find the devices IP address create an account at the miCasaverde homepage and click in the tab "Support" then "Setup" and "VeraLite". Include other devices to the Veras network in the menu "Devices" with "Add Device", then "Add Z-Wave Devices". Exclude devices using the menu "Devices" with "Add Devices", then "Advanced Z_Wave Devices", then "Remove one".
Important safety information
Please read this manual carefully. Failure to follow the recommendations in this manual may be dangerous or may violate the law. The manufacturer, importer, distributor and seller shall not be liable for any loss or damage resulting from failure to comply with the instructions in this manual or any other material. Use this equipment only for its intended purpose. Follow the disposal instructions. Do not dispose of electronic equipment or batteries in a fire or near open heat sources.Product Description
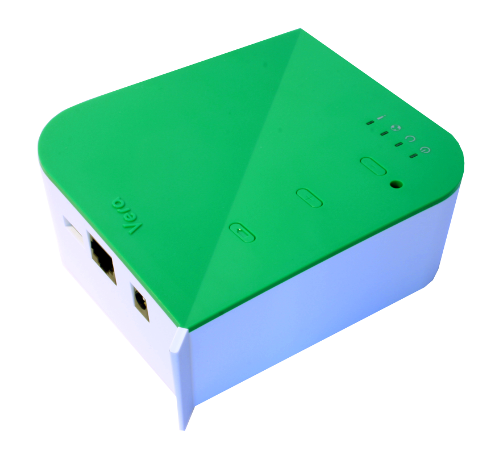
The miCasaverde Vera Lite is a consumer electronics device used for home automation. Vera Lite gateway communicates with electronic sensors and devices located throughout home using wireless and wired communications and connects to central portal server using existing broadband connection (Cable or DSL).
Internal Z-Wave interface module allows user to control Z-Wave sensors, appliance controls and automation devices.
Vera Lite integrates multiple complicated control, automation and internet protocols into one simple plug"n"play device. It provides a clear, consistent interface that allows user to manage home easily, whether at home, office or using mobile phone on the road.
The Vera Lite works with the MIOS Web-OS.
Installation
- Plug the Vera Lite into your mains supply and connect it with an Ethernet cable to the internet via router or home network.
- Simply switch on the Vera Lite and wait about 2 minutes until the LEDs at the front light up continuously.
- Open the website http://getvera.com/support/ and select the support-button.
- Select the tab "Support" and then click on "Setup" and chose "VeraLite".
- Create a new account or login with your existing account.
- Now you can find the IP-address of your device and go to the homepage of your Vera via webbrowser.
Product Usage
With the webinterface you can control actuators like dimmer, thermostats and electrical switches and you can see information and data from your sensors. Further information you can find directly on the website.
| Reset to factory default | Vera Lite Setup -> Advanced -> Backup -> Restore Factory Defaults Alternatively you can reset the Vera Lite by pushing the reset button with a stick for at least 10 seconds. |
| Inclusion |
Alternatively, for Inclusion and Exclusion of devices you can power the Vera with 4 x AA batteries. You can carry out the function directly near the device by using the hardware buttons on the Vera Lite. |
| Exclusion |
Alternatively, for Inclusion and Exclusion of devices you can power the Vera with 4 x AA batteries. You can carry out the function directly near the device by using the hardware buttons on the Vera Lite. |
| NIF | To send out a Node Information Frame type in the following line into your browsers address bar and replace the IP with the IP of your device:
|
| Wakeup | XXXWakeupDescription |
| Protection | XXXProtection |
| FirmwareUpdate | XXXFirmwareUpdate |
| SetAssociation |
|
Special Operations as Z-Wave Controller
As long as this device is not included into a Z-Wave network of a different controller it is able to manage its own Z-Wave network as primary controller. As a primary controller the device can include and exclude other devices in its own network, manage associations, and reorganize the network in case of problems. The following controller functions are supported:
Inclusion of other devices
Communication between two Z-Wave devices only works if both belong to the same wireless network. Joining a network is called inclusion and is initiated by a controller. The controller needs to be turned into the inclusion mode. Once in this inclusion mode the other device needs to confirm the inclusion - typically by pressing a button.
If current primary controller in your network is in special SIS mode this and any other secondary controller can also include and exclude devices.
To become primary a contoller have to be resetted and then include a device.
- Select "Device" within the Vera Lites menu.
- Confirm the button "Add Device".
- Confirm the button "Add Z-Wave Devices".
- Confirm the inclusion at the device. See the devices manuals for details how to include them at the icon I.
- The new device now should appear on the user interface.
If the inclusion fails maybe it is already included in a different Z-Wave network. You can exclude the device and repeat the steps for inclusion.
Exclusion of other devices
The primary controller can exclude devices from the Z-Wave network. During exclusion the relationship between the device and the network of this controller is terminated. No communication between the device and other devices still in the network can happen after a successful exclusion. The controller needs to be turned into the exclusion mode. Once in this exclusion mode the other device needs to confirm the exclusion - typically by pressing a button.
Attention: Removing a device from the network means that it is turned back into factory default status. This process can also exclude devices from it's previous network.
- Select "Device" within the Vera Lites menu.
- Confirm the button "Add Devices".
- Confirm the button "Advanced Z-Wave Devices".
- Confirm the button "Remove one".
- Confirm the exclusion at the device. See the devices manuals for details how to include them at the icon I.
- The device now should disappear on the user interface.
Technical Data
| Dimensions | 0.0120000x0.0100000x0.0040000 mm |
| Weight | 320 gr |
| EAN | 728028227765 |
| Device Type | Static Controller |
| Generic Device Class | Static Controller |
| Firmware Version | 01.00 |
| Z-Wave Version | 03.14 |
| Certification ID | ZC08-10090001 |
| Z-Wave Product Id | 008c.0001.0001 |
| Frequency | Europe - 868,4 Mhz |
| Maximum transmission power | 5 mW |